Cut-Through Switching
Goals
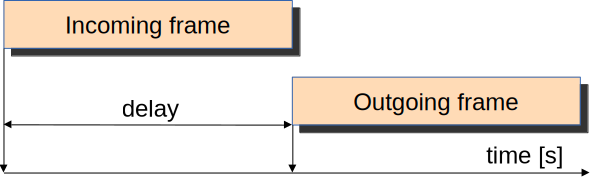
In conventional store-and-forward switching, each switch must receive and buffer the entire frame before forwarding it to the next hop. This store-and-forward process adds delay per hop that is proportional to the frame size, as the switch cannot begin transmission until the complete frame has been received. When packets traverse multiple switches, these delays accumulate, resulting in significant end-to-end latency.
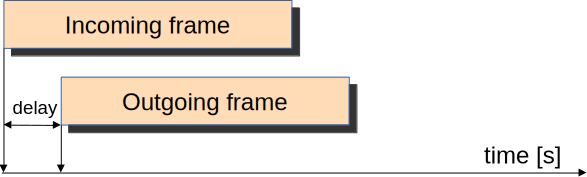
Cut-through switching addresses this problem by starting the forwarding process as soon as the destination MAC address and outgoing interface are determined, typically after receiving just the frame header. This allows the switch to begin forwarding the frame while it is still being received, substantially reducing switching delay, especially in multi-hop scenarios.
However, cut-through switching involves trade-offs compared to store-and-forward switching. Since forwarding begins before the entire frame is received, the frame check sequence (FCS) cannot be verified at each switch, potentially leading to a higher error rate as corrupted frames may be forwarded through the network. The FCS check is instead performed at the destination host. In this showcase, we will demonstrate cut-through switching and compare it to store-and-forward switching in terms of delay, highlighting the performance benefits of this forwarding method.
4.6The Model
Cut-through switching makes use of intranode packet streaming in INET’s modular Ethernet model. Packet streaming is required because the frame needs to be processed as a stream (as opposed to as a whole packet) in order for the switch to be able to start forwarding it before the whole packet is received.
Note
The default is store-and-forward behavior in hosts such as StandardHost.
The example simulation contains two TsnDevice nodes connected by two TsnSwitch nodes (all connections are 1 Gbps):
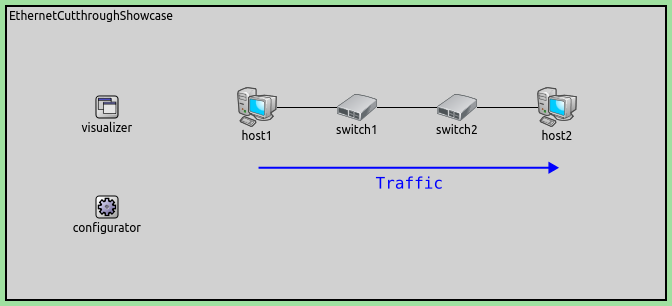
In the simulation, host1 sends 1000-Byte UDP packets to host2, with a mean arrival time of 200ms,
and 50ms jitter. There are two configurations in omnetpp.ini, StoreAndForward and CutthroughSwitching,
which only differ in the use of cut-through switching.
Here are the configurations:
[General]
network = CutthroughSwitchingShowcase
sim-time-limit = 1s
abstract = true

# all Ethernet interfaces have 1 Gbps speed
*.*.eth[*].bitrate = 1Gbps

# applications
*.device*.numApps = 1
*.device1.app[0].typename = "UdpSourceApp"
*.device1.app[0].io.destAddress = "device2"
*.device1.app[0].io.destPort = 1000
*.device1.app[0].source.packetLength = 1200B # ~10us transmission duration
*.device1.app[0].source.productionInterval = truncnormal(200us,50us) # 3 hops without cut-through would fill up the queues

*.device2.app[0].typename = "UdpSinkApp"
*.device2.app[0].io.localPort = 1000

[Config StoreAndForward]
description = "Switches completely receive incoming frames before forwarding them"

#default behavior, no configuration required

[Config CutthroughSwitching]
description = "Switches start forwarding incoming frames after the Ethernet MAC header has been received"

# enable cut-through in all network nodes
*.*.hasCutthroughSwitching = true
The default LayeredEthernetInterface in TsnDevice and TsnSwitch has cut-through disabled by default. In order to use
Cut-through is enabled by setting the hasCutthroughSwitching parameter to true.
Results
The following video shows the store-and-forward behavior in Qtenv:
The next video shows the cut-through behavior:
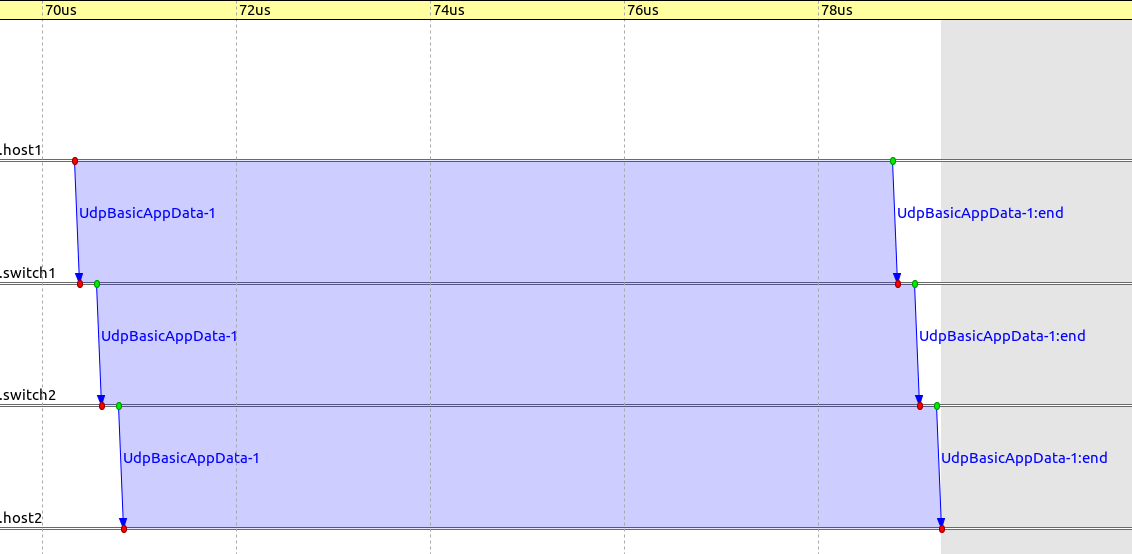
The following sequence chart excerpt shows a packet sent from host1 to host2 via the switches,
for store-and-forward and cut-through, respectively (the timeline is linear):
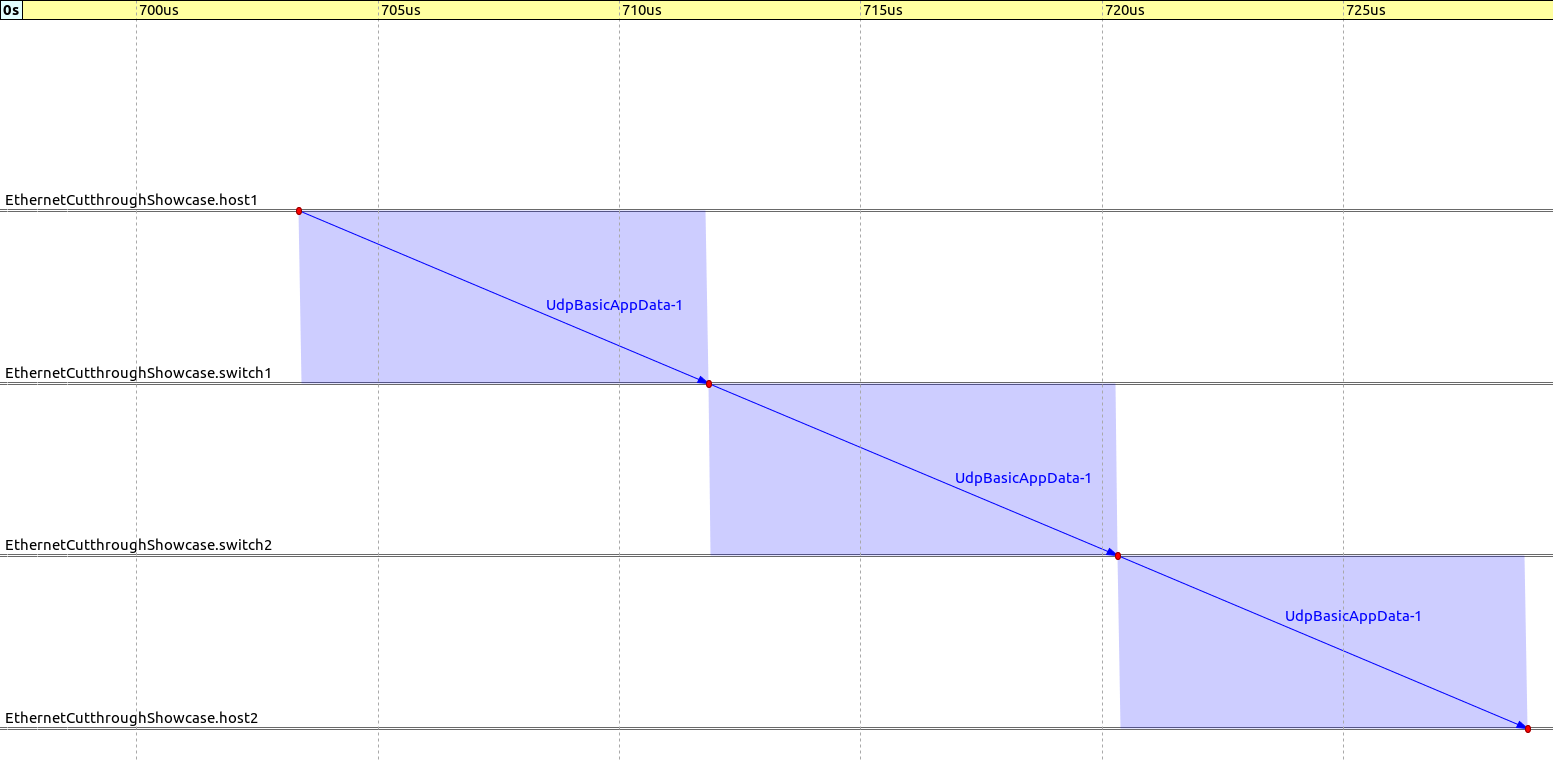
We compared the end-to-end delay of the UDP packets in the case of store-and-forward switching vs cut-through switching:
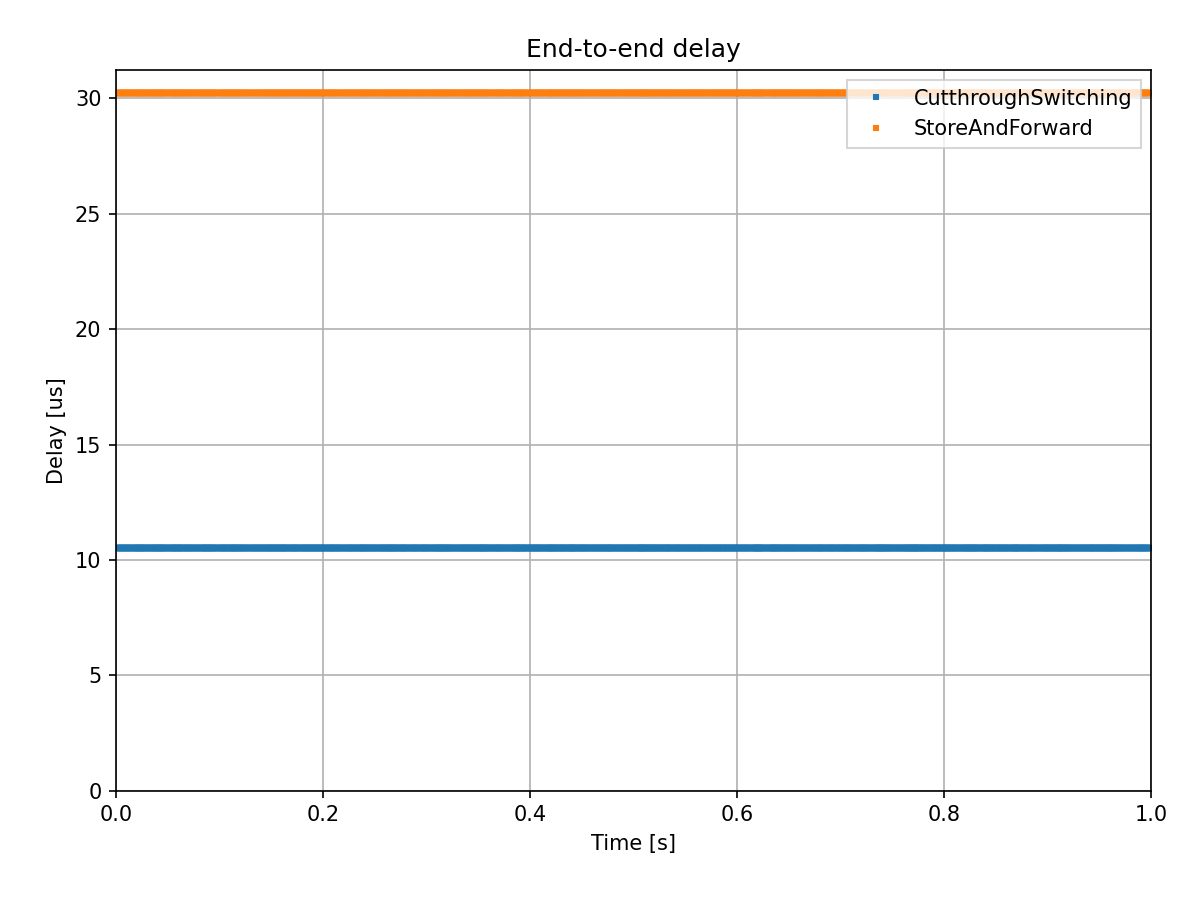
We can verify that result analytically. In the case of store-and-forward, the end-to-end duration
is 3 * (transmission time + propagation time), around 30.246us. In the case of cut-through,
the duration is 1 * transmission time + 3 propagation time + 2 * cut-through delay, around 10.534us.
Sources: omnetpp.ini, CutthroughSwitchingShowcase.ned
Try It Yourself
If you already have INET and OMNeT++ installed, start the IDE by typing
omnetpp, import the INET project into the IDE, then navigate to the
inet/showcases/tsn/cutthroughswitching folder in the Project Explorer. There, you can view
and edit the showcase files, run simulations, and analyze results.
Otherwise, there is an easy way to install INET and OMNeT++ using opp_env, and run the simulation interactively.
Ensure that opp_env is installed on your system, then execute:
$ opp_env run inet-4.6 --init -w inet-workspace --install --build-modes=release --chdir \
   -c 'cd inet-4.6.*/showcases/tsn/cutthroughswitching && inet'
This command creates an inet-workspace directory, installs the appropriate
versions of INET and OMNeT++ within it, and launches the inet command in the
showcase directory for interactive simulation.
Alternatively, for a more hands-on experience, you can first set up the workspace and then open an interactive shell:
$ opp_env install --init -w inet-workspace --build-modes=release inet-4.6
$ cd inet-workspace
$ opp_env shell
Inside the shell, start the IDE by typing omnetpp, import the INET project,
then start exploring.
Discussion
Use this page in the GitHub issue tracker for commenting on this showcase.